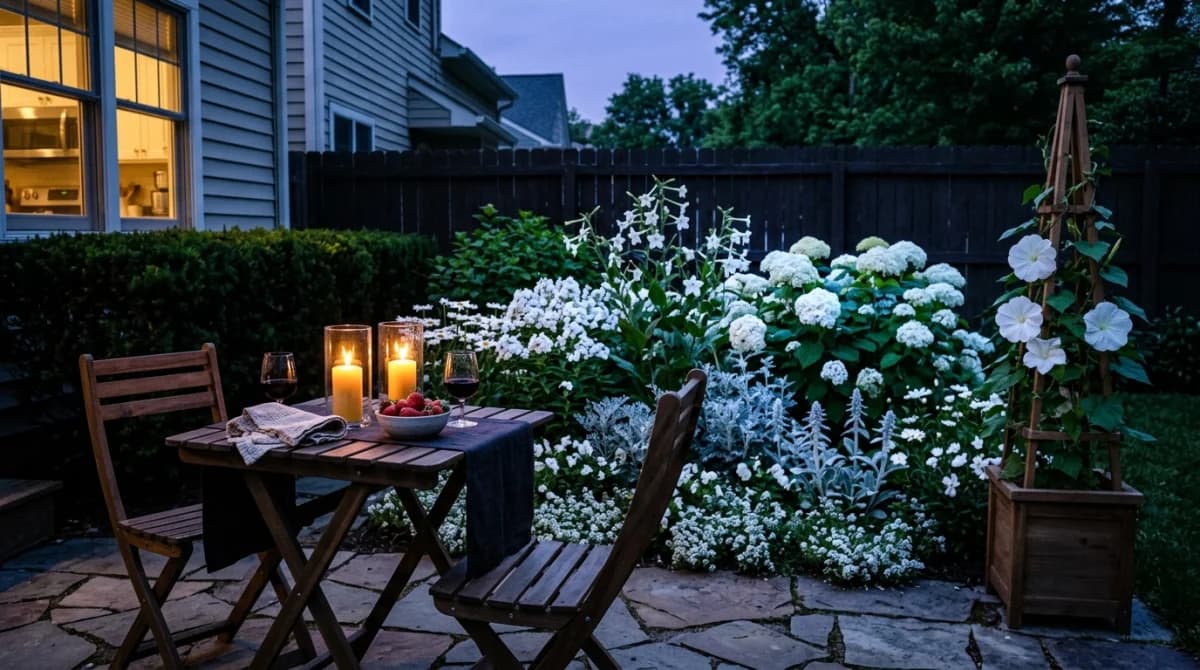
The sun sets earlier with each passing September evening, and suddenly those paths you navigate effortlessly by day become obstacle courses after dinner. The temptation is to over-light—string up bright fixtures every few feet and blast away the darkness. But walk through any neighborhood that’s taken that approach, and you’ll understand the problem immediately. It looks like an airport taxiway, harsh and utilitarian, destroying any sense of mystery or intimacy your garden might offer at dusk.
Exceptional path lighting does three things simultaneously: it provides enough illumination for safe footing, it enhances your landscape’s character after dark, and it disappears into the background so you experience the garden rather than the fixtures. That balance is easier to achieve than you might think, but it requires abandoning some common assumptions about how much light you actually need.
The Science of Seeing at Night
Human eyes adapt remarkably well to low light conditions. After about 20 minutes in relative darkness, your night vision improves dramatically. The problem with overlighting isn’t just aesthetic—it’s physiological. Bright lights create harsh contrast that actually makes it harder to see, forcing your pupils to constantly adjust as you move between illuminated and shadowed areas.
The goal isn’t to replicate daylight. It’s to provide gentle visual cues that define edges, reveal level changes, and highlight potential trip hazards while letting your eyes do what they evolved to do: gather ambient light and build a coherent picture of your surroundings.
Professional lighting designers aim for roughly 0.5 to 2 foot-candles of light on pathway surfaces—enough to clearly distinguish texture and see obstacles, but nowhere near the 50+ foot-candles of typical indoor lighting. This subtle illumination level creates safe navigation while preserving the evening atmosphere that makes outdoor spaces magical.
Fixture Selection Makes or Breaks the Design
Not all path lights are created equal, and the difference between hardware-store commodity fixtures and quality landscape lighting products is vast. The fixtures themselves should be almost invisible during the day, with finishes that blend into mulch or plantings rather than announcing their presence.
Low-voltage LED path lights in the 3-to-5-watt range handle most residential applications beautifully. Look for fixtures with true warm color temperatures—2700K to 3000K—that mimic the glow of incandescent bulbs. Avoid anything marketed as “daylight” or “cool white” in garden applications. That blue-tinted light renders foliage flat and uninviting while creating the very airport aesthetic you’re trying to avoid.
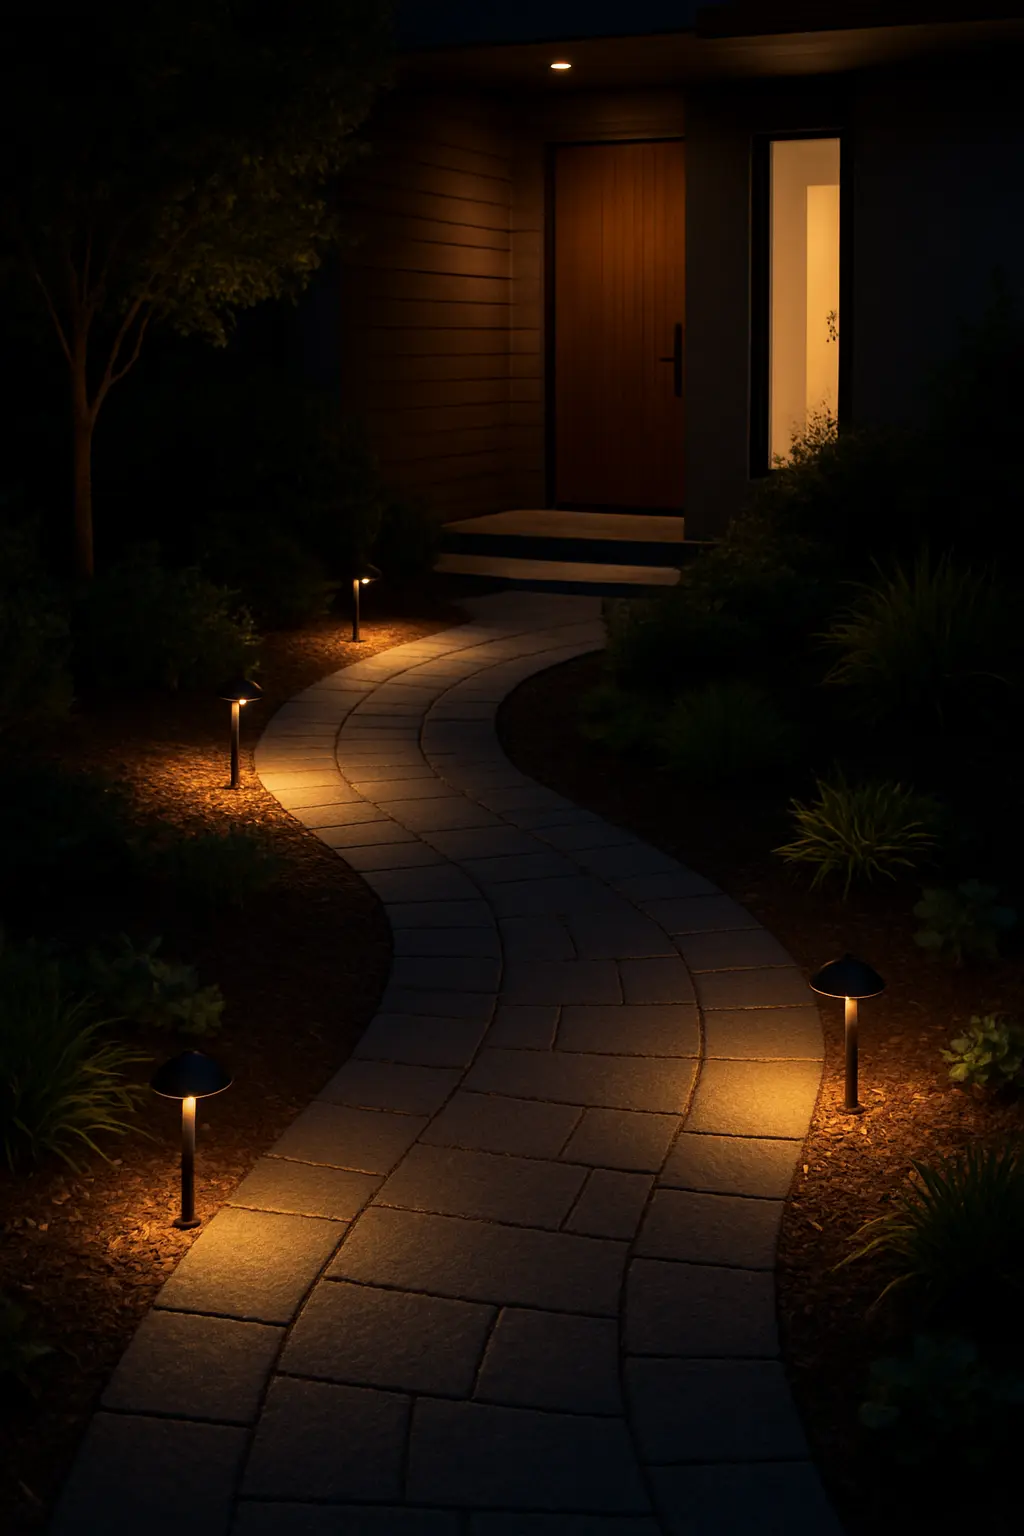
Shielded fixtures that direct light downward deserve special attention. Top hats, hoods, or louvered designs prevent that direct glare that blinds rather than guides. If you can see the bulb itself while walking the path, the fixture is poorly designed for landscape use. The light source should be hidden, with only its effect visible.
Consider fixtures with adjustable heads or swivel mounts. The ability to fine-tune the beam angle after installation lets you highlight specific features or avoid washing out plants that look better in silhouette.
Spacing Strategy: Less Is More
Here’s where most DIY installations go wrong: they space fixtures evenly like street lamps, creating that marching-soldier rhythm that screams “artificial.” Natural, sophisticated path lighting plays with intervals, clustering fixtures where illumination matters most and leaving quieter stretches in between.
Start with the critical zones—steps, intersections, sharp curves, and grade changes. These spots need reliable light for safety. A fixture on either side of steps, for instance, clearly defines the hazard without flooding the area.
For straight stretches of level path, fixtures every 8 to 14 feet typically provide sufficient light overlap without overcrowding. But don’t measure rigidly. Let your landscape’s structure guide placement. Position lights to graze interesting textures, back-light ornamental grasses, or pool in intimate seating areas.
The overlapping-circles principle applies: each fixture creates a cone of light that should just kiss the edge of the next fixture’s pool. Stand where you plan to place each light and look toward the previous fixture. If you can see its glow but not feel overwhelmed by brightness, you’re in the right range.
Wiring Reality: Plan Before You Dig
Most residential path lighting runs on low-voltage systems—typically 12V or 24V powered by a transformer plugged into a standard outlet. This approach is inherently safer than line voltage and much easier for homeowners to install without permits or licensed electricians in most jurisdictions.
The transformer location matters. It needs to be weatherproof, accessible for timer adjustments, and positioned to minimize wire runs. Place it centrally to your lighting layout rather than at one end, which helps prevent voltage drop issues at distant fixtures.
Wire gauge affects everything. Skimping on wire—using 16-gauge when 12-gauge is appropriate—causes distant lights to dim noticeably. For runs under 50 feet with 5-6 fixtures, 14-gauge wire usually suffices. Beyond that, or for more fixtures, step up to 12-gauge. The cost difference is minimal compared to the frustration of troubleshooting dim lights later.
Bury wire at least 6 inches deep, protected by landscape fabric or shallow conduit where you might dig later. Route cables along bed edges and under plantings rather than through open lawn where aerating equipment might damage them. Leave a few extra feet of wire at each fixture location—future adjustments become simple rather than impossible.
Color Temperature and the Evening Garden
The warmth of your light dramatically affects how plants and hardscape appear after dark. Cool-toned LEDs make green foliage look gray and washed out. They flatten dimensional plantings into cardboard cutouts and give stone and wood an unnatural, sterile appearance.
Warm light in the 2700K to 3000K range preserves the amber and green tones that make gardens inviting. It enhances the texture of bark, makes flower colors glow rather than fade, and creates the comfortable atmosphere that invites you to linger outside after dark.
Some designers even mix color temperatures intentionally—using 3000K for primary path lighting and dropping to 2400K for accent lights on specimen trees or architectural features. This subtle layering adds depth and draws attention exactly where you want it.
Test before you commit. Most quality manufacturers offer sample programs or have generous return policies. Install one fixture, live with it for a few evenings, and make sure the light quality matches your expectations before ordering two dozen.
Bringing It All Together with Gardenly
Visualizing lighting placement before installation removes the guesswork that leads to over-lit or poorly balanced designs. With Gardenly’s AI design tools , you can upload a photo of your existing paths, experiment with fixture placement and styles, and see realistic night-rendered views of how your lighting will actually look.
Test different spacing intervals, try warm versus cool temperatures, and preview how various fixture heights affect the light spread—all before driving a single stake. The platform even accounts for your region’s twilight conditions, so you’re seeing accurate representations of how your lighting will perform in your actual climate.
Beyond lighting, you can also explore different path materials and layouts to create a cohesive evening garden experience.
Beyond Safety: Lighting as Garden Art
Once you’ve handled the practical aspects—safe navigation, appropriate spacing, quality fixtures—you can start thinking about lighting as a creative tool. Use path lights to reveal specific plants at their peak. In fall, a few strategically placed fixtures can transform ornamental grasses into glowing sculpture.
Layer your lighting. Combine path-level illumination with subtle uplighting on a focal tree and perhaps a wash of light on a textured fence or stone wall. This depth creates visual interest and makes small gardens feel larger by defining multiple planes of attention.
Consider moonlighting—mounting fixtures high in tree branches to cast dappled shadows below. Paired with ground-level path lights, this technique mimics natural night conditions while adding safety lighting in the most organic way possible.
Maintenance and Seasonal Adjustments
Even the best lighting design needs occasional attention. Check fixtures quarterly, wiping lenses clean of debris, spider webs, and pollen. Dirty optics can cut light output by 30% or more.
As plants grow, they’ll shade or block fixtures over time. What worked perfectly at installation might need adjustment two years later. That’s normal—gardens evolve, and lighting should evolve with them.
In fall, falling leaves can bury low fixtures. A quick walk-through every couple of weeks keeps paths visible and prevents moisture from accumulating around connections.
Test your system before the first frost. Cold weather doesn’t damage LED fixtures or low-voltage wiring, but it’s much easier to troubleshoot issues in September than in January when the ground is frozen.
The Evening Garden Awaits
The right lighting doesn’t just illuminate your paths—it extends your garden’s usable hours into the evening and transforms your landscape into a new experience once darkness falls. The key is restraint: resist the urge to over-light, trust in warm color temperatures, and remember that shadows are as important as the illuminated areas.
As autumn deepens and evenings stretch longer, properly lit paths become the infrastructure that keeps you connected to your outdoor spaces. They’re the difference between retreating indoors after dinner and choosing to carry your coffee out to the garden, where subtle glows reveal a landscape that’s somehow more intimate and inviting than its daytime counterpart.
Ready to design your perfectly lit evening garden? Start planning with Gardenly to visualize lighting placement, test different fixture styles, and see realistic night renderings before you invest in hardware.
Sources & Further Reading
- Summer Loving—Energy-Efficient Outdoor Lighting — U.S. Department of Energy
- Outdoor Solar Lighting — U.S. Department of Energy
- Purchasing Energy-Efficient Exterior Lighting — U.S. Department of Energy