
There’s a rhythm to the gardening year, and late September hits a peculiar sweet spot. The planting frenzy has passed, but you’re not yet buried in falling leaves or racing against frost deadlines. For most of us, right now is the last calm moment before October’s chaos—which makes it the perfect time to care for the tools that made this season possible.
A sharp, well-maintained tool isn’t just easier to use. It’s safer, more effective, and it respects the plants you’re working with. Clean cuts from sharp pruners heal faster and resist disease better than ragged tears from dull blades. Properly oiled handles don’t splinter. Sharpened hoe blades slice through weeds with one stroke instead of three. The hour you spend on maintenance this afternoon will save you multiple hours of frustration and re-work next spring.
Why Tool Maintenance Matters More Than You Think
Garden tools take remarkable abuse. Soil contains silica particles that abrade metal edges with every thrust. Moisture invites rust. Sap and plant resins accumulate into sticky deposits that gum up moving parts. Most tools could survive a season or two of neglect, but the degradation is exponential—by year three, you’re fighting your equipment as much as you’re working with it.
Professional gardeners maintain their tools religiously not because they’re fastidious, but because they can’t afford the inefficiency of dull equipment. When you’re hand-weeding hundreds of feet of beds or pruning dozens of shrubs, the difference between sharp and dull tools is the difference between finishing by noon and finishing after dark.
For home gardeners, the math is equally compelling even if the scale is smaller. A $40 pair of bypass pruners can last twenty years with minimal care or three seasons with none. Quality tools represent a genuine investment, and maintenance is simply protecting that investment against entirely preventable deterioration.
The End-of-Season Cleaning Ritual
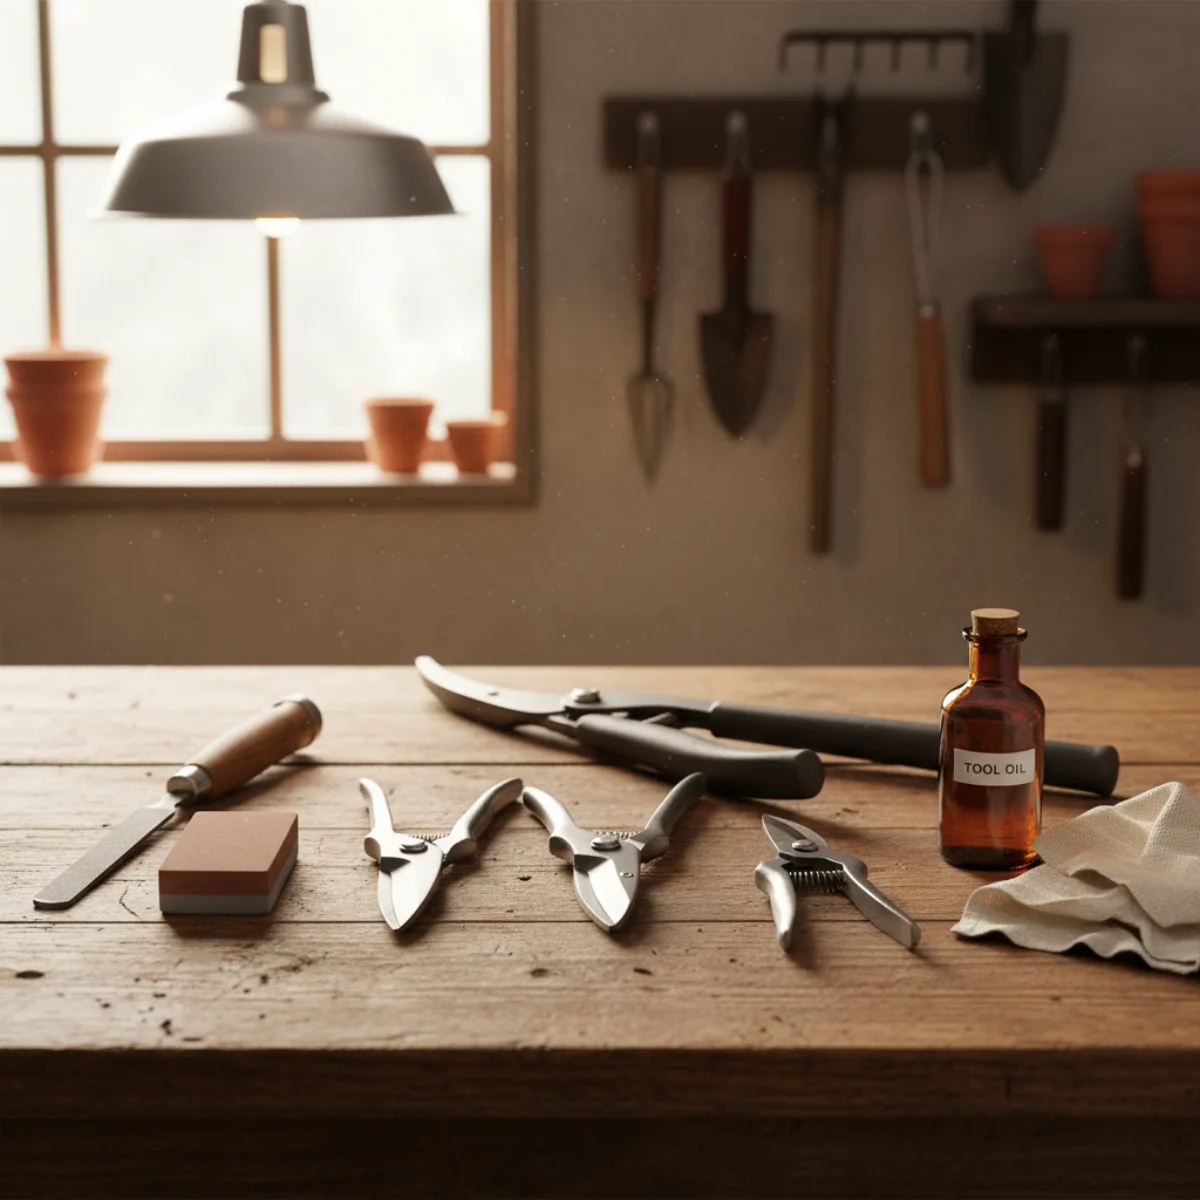
Start by gathering everything—pruners, loppers, shears, shovels, hoes, trowels, cultivators, and anything else that saw action this season. Lay them out on a tarp or workbench so you can see exactly what needs attention.
For tools with moving parts—pruners, shears, loppers—disassemble if possible. Most bypass pruners have a simple pivot bolt that unscrews with a standard screwdriver or Allen key. Separating the blades lets you clean thoroughly and inspect for damage you might otherwise miss.
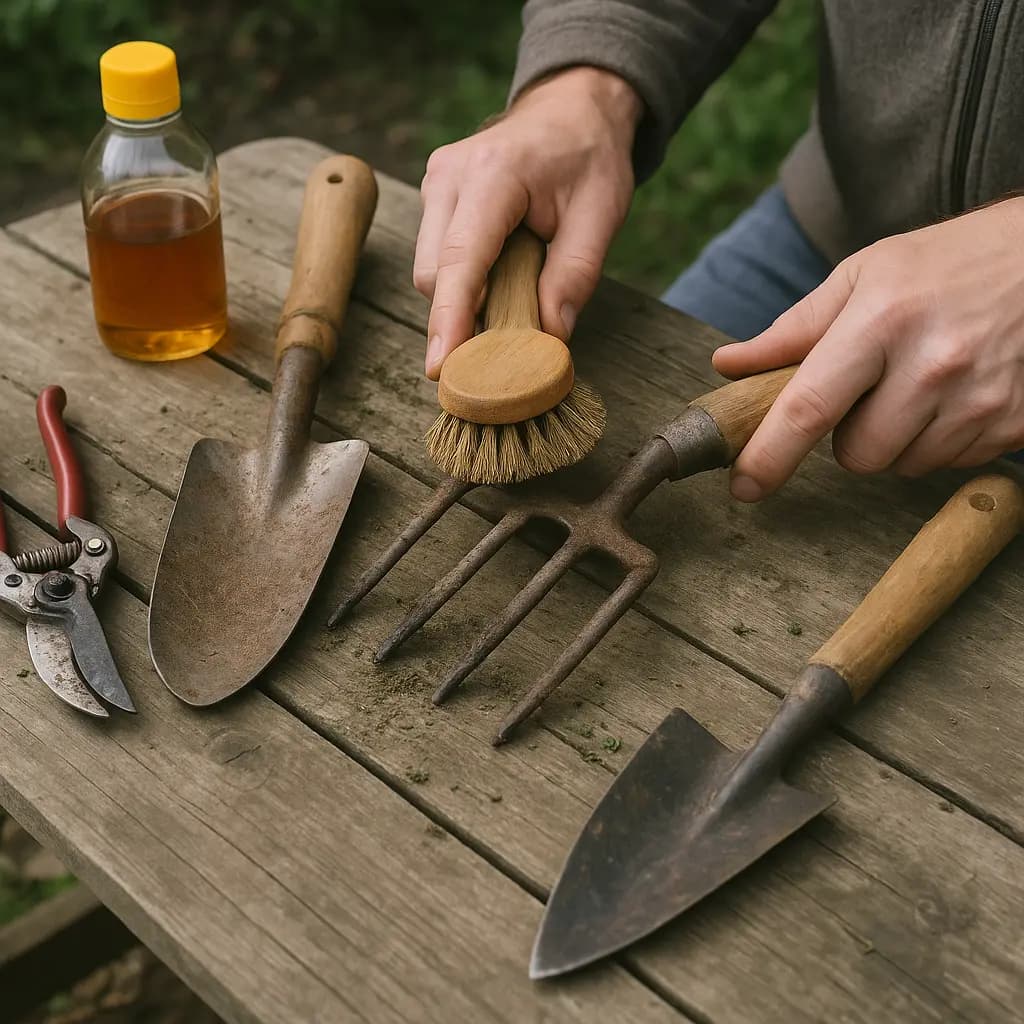
Remove dried soil, sap, and plant residue with a stiff wire brush. For stubborn deposits, a putty knife or old flathead screwdriver makes a good scraper. Avoid power wire wheels unless you’re experienced—they remove material aggressively and can damage blade bevels if you’re not careful.
Once the bulk of debris is gone, wash everything with soapy water. A bucket of warm water with a few drops of dish soap and a scrub brush handle most situations. For sticky sap or resin buildup, rubbing alcohol or mineral spirits on a rag cuts through what soap can’t.
Dry thoroughly immediately after washing. Don’t leave tools to air-dry—that’s an invitation for surface rust to start. A shop rag followed by a few minutes in the sun or near a fan ensures everything is bone-dry before you move to the next step.
Sharpening: Restoring the Edge
Sharp tools transform gardening from a chore into a pleasure. The good news is that sharpening is far less mysterious than most people assume. You don’t need specialized equipment or years of practice—just a basic understanding of what you’re trying to achieve.
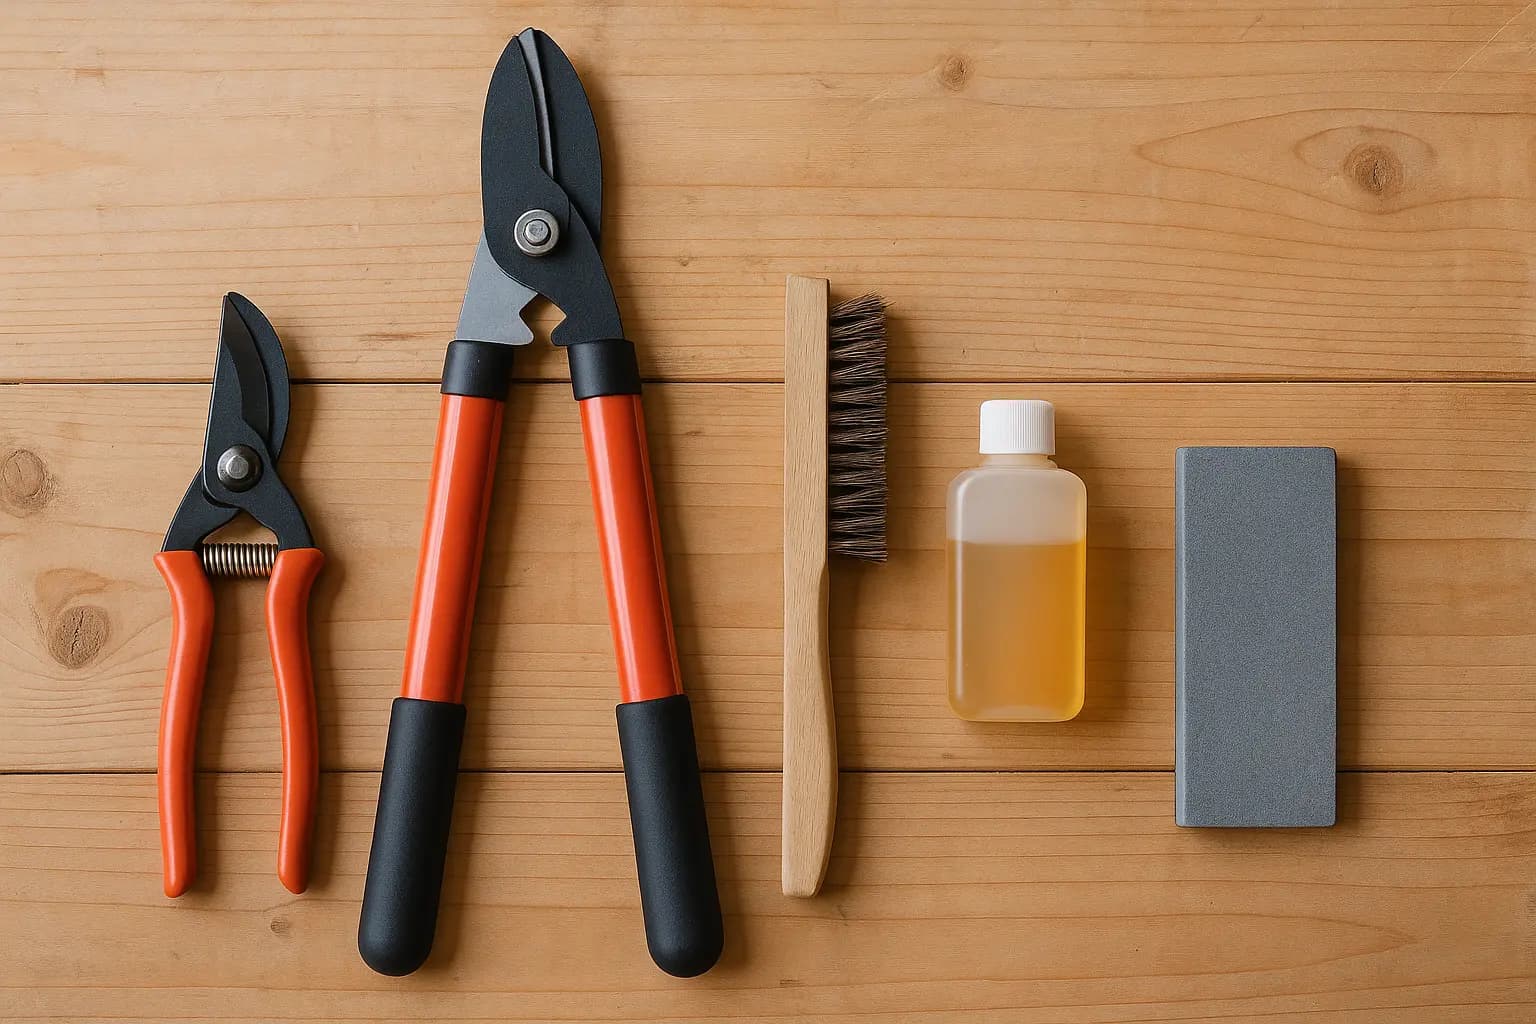
Pruners, loppers, and shears all have a single beveled cutting edge that meets a flat surface, like scissors. Your job is to restore that bevel angle without rounding it over or creating a wire edge. A standard 10-inch mill bastard file handles most garden tool sharpening beautifully.
Lock the tool in a vise or brace it firmly against your work surface. File in one direction only—from the base of the blade toward the tip, following the existing bevel angle. Light pressure is sufficient; let the file’s teeth do the work. After 10-15 strokes, you should feel a burr forming on the flat side of the blade.
Flip the tool over and make one or two light passes with the file flat against the non-beveled side to remove that burr. Test sharpness by cutting a piece of paper—a sharp edge will slice cleanly without tearing or requiring sawing motion.
For shovels, spades, and hoes, you’re creating a chisel-like edge on the business end. A bastard file or even an angle grinder with a flap disc works well here. Again, maintain the existing bevel angle—typically around 30 to 45 degrees—and file in one direction. These tools don’t need razor sharpness; you’re looking for a clean edge that can bite into soil efficiently.
Trowels and cultivators rarely need sharpening in the traditional sense, but you can touch up any obviously rounded or damaged points with a file to restore effectiveness.
Rust Removal and Prevention
Light surface rust comes off easily with steel wool and a bit of elbow grease. For heavier rust, make a paste from baking soda and water, apply it to the affected areas, let it sit for 20 minutes, then scrub with steel wool. For tools you don’t mind potentially discoloring, white vinegar baths work remarkably well—submerge rusty metal parts for a few hours, then scrub.
Once rust is removed and the metal is completely dry, apply a protective coating. Options range from simple to sophisticated:
Plain motor oil works perfectly for most applications. Wipe a thin coat over all metal surfaces with a rag. It’s cheap, effective, and you probably already have it in the garage.
Boiled linseed oil—available at any hardware store—provides slightly better rust protection and conditions wooden handles simultaneously. Apply thin coats with a rag, letting each coat soak in before wiping away the excess.
Tool-specific products like Felco spray or Camellia oil offer premium protection and smell better than motor oil, but they’re not strictly necessary unless you’re maintaining expensive Japanese pruners that deserve special treatment.
Some gardeners swear by sticking tools into a bucket of sand mixed with oil. Pour a quart of motor oil into a 5-gallon bucket, fill it with sand, mix thoroughly, and store shovels and hoes blade-down in the mixture between uses. The oil-sand combination cleans and protects in one motion.
Handle Care: The Often-Forgotten Component
Wooden handles suffer from moisture swings and UV exposure. Left untreated, they dry out, crack, and eventually splinter—all of which makes tools uncomfortable or downright dangerous to use.
Sand any rough spots lightly with 100-grit sandpaper. You’re not refinishing furniture; you just want to smooth out any developing splinters or rough patches.
Apply boiled linseed oil liberally with a rag or brush, working it into the grain. Let it soak for 15 minutes, then wipe away any excess. The oil penetrates the wood, helping it resist moisture and preventing cracking. Two coats applied over the course of an afternoon protect handles through winter and into next season.
For handles that are already cracking or splitting, wrap the damaged area tightly with electrical tape or hockey tape as a temporary fix, but plan to replace the handle before next season’s heavy use. Most tool handles are surprisingly easy to replace—the hardware store sells pre-sized replacements for common tools.
Storage Strategy: Location and Organization
How you store tools matters almost as much as how you maintain them. Damp sheds and garages invite rust regardless of how well you’ve cleaned and oiled. Ground contact is particularly problematic—never lean tools directly on concrete floors, where moisture wicks up into metal and wood.
Wall-mounted storage is ideal. Pegboard with hook systems lets you customize tool placement and keeps everything visible and accessible. French cleat systems offer more capacity for heavier tools. Even simple nails driven into studs at appropriate heights work perfectly well.
Keep cutting tools—pruners, shears, knives—in a toolbox or bag where blades won’t bang against other metal. You’ve just carefully sharpened them; letting them clatter around together will dull edges and potentially chip blades.
For tools you won’t need until spring, consider an extra layer of protection. Wrap blades in oily rags or newspaper, or slip them into protective sleeves. This is especially important in humid climates or unheated storage buildings where temperature swings create condensation.
The Off-Season Inspection
While you’re handling each tool, inspect for damage beyond normal wear. Cracked handles, bent tines, broken rivets, stuck pivot points—late September is the time to discover these problems, not mid-April when you’re eager to get in the ground.
Tools worth repairing should go to a professional sharpening service if they’re beyond your skill level to fix. Many communities have mobile sharpening services that visit farmers’ markets or schedule neighborhood stops. A $10 professional sharpening job can revive a $60 tool that you’d otherwise replace.
For tools that have reached the end of their useful life, dispose of them properly and add replacements to your shopping list. Black Friday and post-season sales often offer the year’s best prices on quality tools—another good reason to assess your inventory now rather than waiting for spring.
While you’re organizing for next season, it’s also the perfect time to plan any fall garden projects. Check out our October preview guide to see what tasks deserve your attention once your tools are ready.
Making It Sustainable
The act of maintaining tools connects you to gardening traditions that go back millennia. Before planned obsolescence and disposable everything, people cared for their implements because replacement was expensive and difficult. There’s something quietly revolutionary about choosing to maintain rather than replace, especially in our current culture of constant consumption.
Well-maintained tools also work better, which makes gardening more enjoyable, which makes you more likely to spend time in the garden, which improves your wellbeing and the ecology of your small piece of earth. The connection isn’t abstract—it’s direct and personal.
An Hour Well Spent
Set aside a comfortable afternoon this week. Put on some music, pour something to drink, and give your tools the attention they’ve earned. By the time you’re finished, you’ll have a collection of sharp, clean, well-oiled implements ready to tackle whatever October and the coming seasons throw at you.
More importantly, you’ll have reinforced a practice that respects your tools, your budget, and your time. The garden rewards attention to small details, and few details are smaller or more impactful than the care you give the implements that connect your intention to the soil.
Ready to plan fall projects for those freshly maintained tools? Explore garden design ideas with Gardenly to visualize your next landscaping project before breaking ground.
Sources & Further Reading
- Maintaining Lawn and Garden Tools — Wisconsin Horticulture, University of Wisconsin Extension
- Care and Maintenance of Garden Tools — OSU Extension Service
- Tool Care Tips — UC Master Gardeners of Santa Clara County