Grow Lights for Seed Starting: What Actually Works (And What Doesn’t)

The single most common reason indoor seedlings fail is inadequate light. Not too little water, not wrong temperature, not bad seeds—light. A seedling that doesn’t get enough light compensates by growing fast in a search for more, producing a tall, spindly, fragile plant that struggles in the garden.
The sun is not actually very helpful here. Unless you live somewhere genuinely sunny and have large south-facing windows with no obstructions, the light that reaches a window-ledge seedling on a February or March day is a fraction of what the plant needs. By the time seedlings stop being leggy and pale, you’ve lost weeks of healthy growing time.
Grow lights solve this. And the technology has improved dramatically—the right setup is no longer expensive or complicated.
What Plants Actually Need From Light
Seeds don’t need light to germinate (most germinate in darkness). The moment they sprout, however, light becomes the primary input for growth.
Young seedlings need:
- Intensity: enough light to drive photosynthesis at a meaningful rate
- Duration: 14-18 hours per day to compensate for indoor light intensity vs. outdoor intensity
- Color spectrum: light in the red and blue wavelengths that plants use most efficiently
This doesn’t require replicating full outdoor sunlight—which would be expensive and intense. It requires providing enough quality light consistently enough to support healthy growth. Modern LED grow lights do this efficiently.
The Types of Grow Lights
T5 and T8 Fluorescent Shop Lights (Still Good)
For years, the standard DIY recommendation was shop lights with T5 fluorescent bulbs—long, tube-style fixtures hung close to seedlings. These are still effective and extremely affordable.
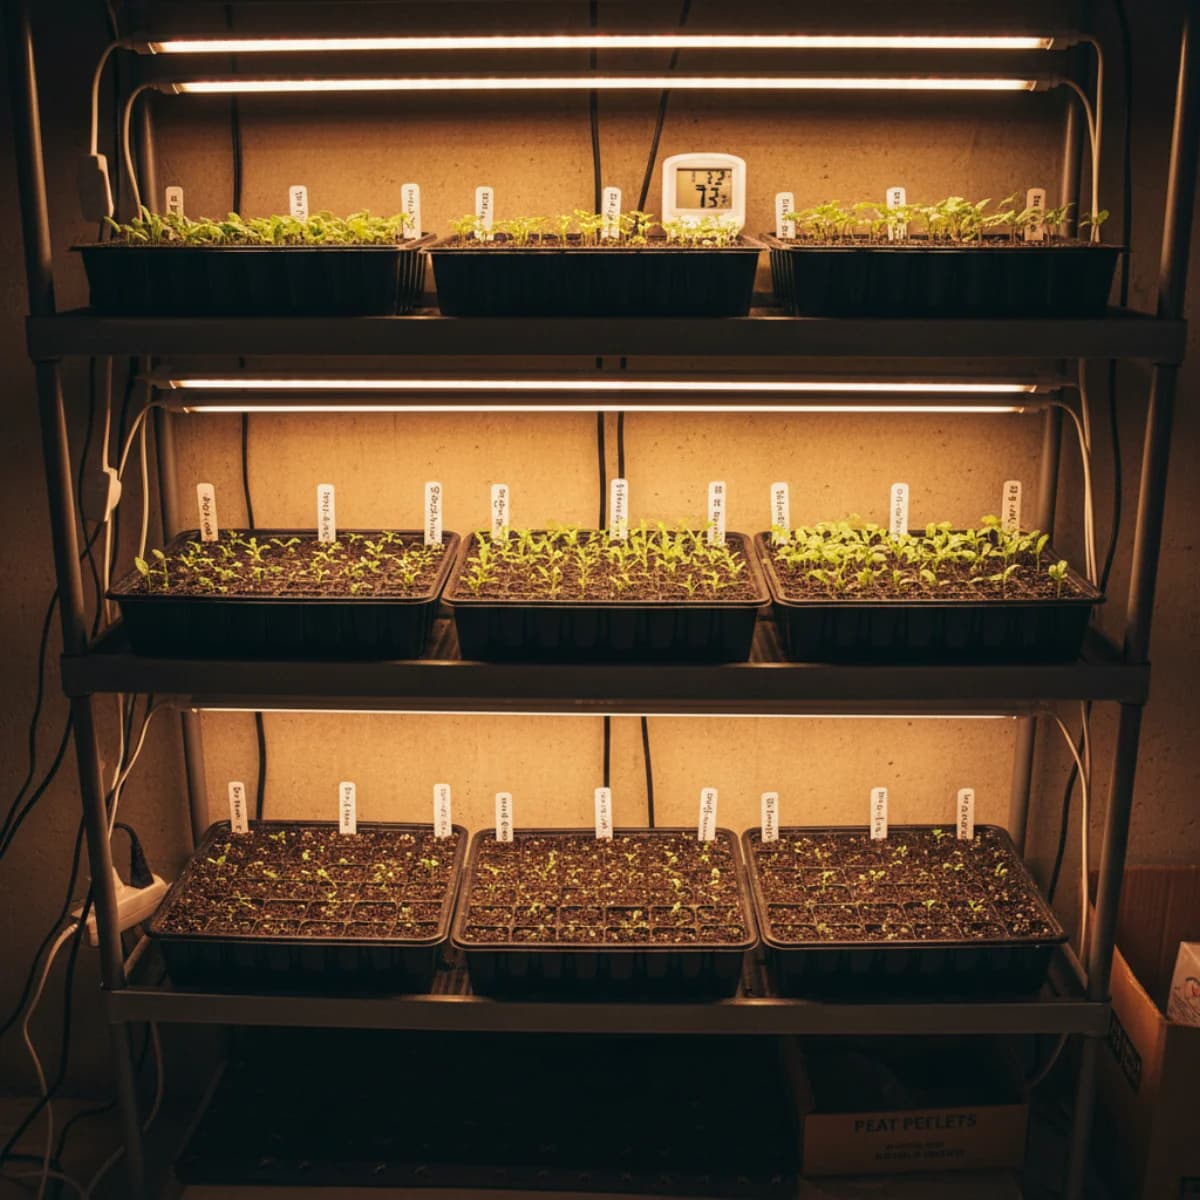
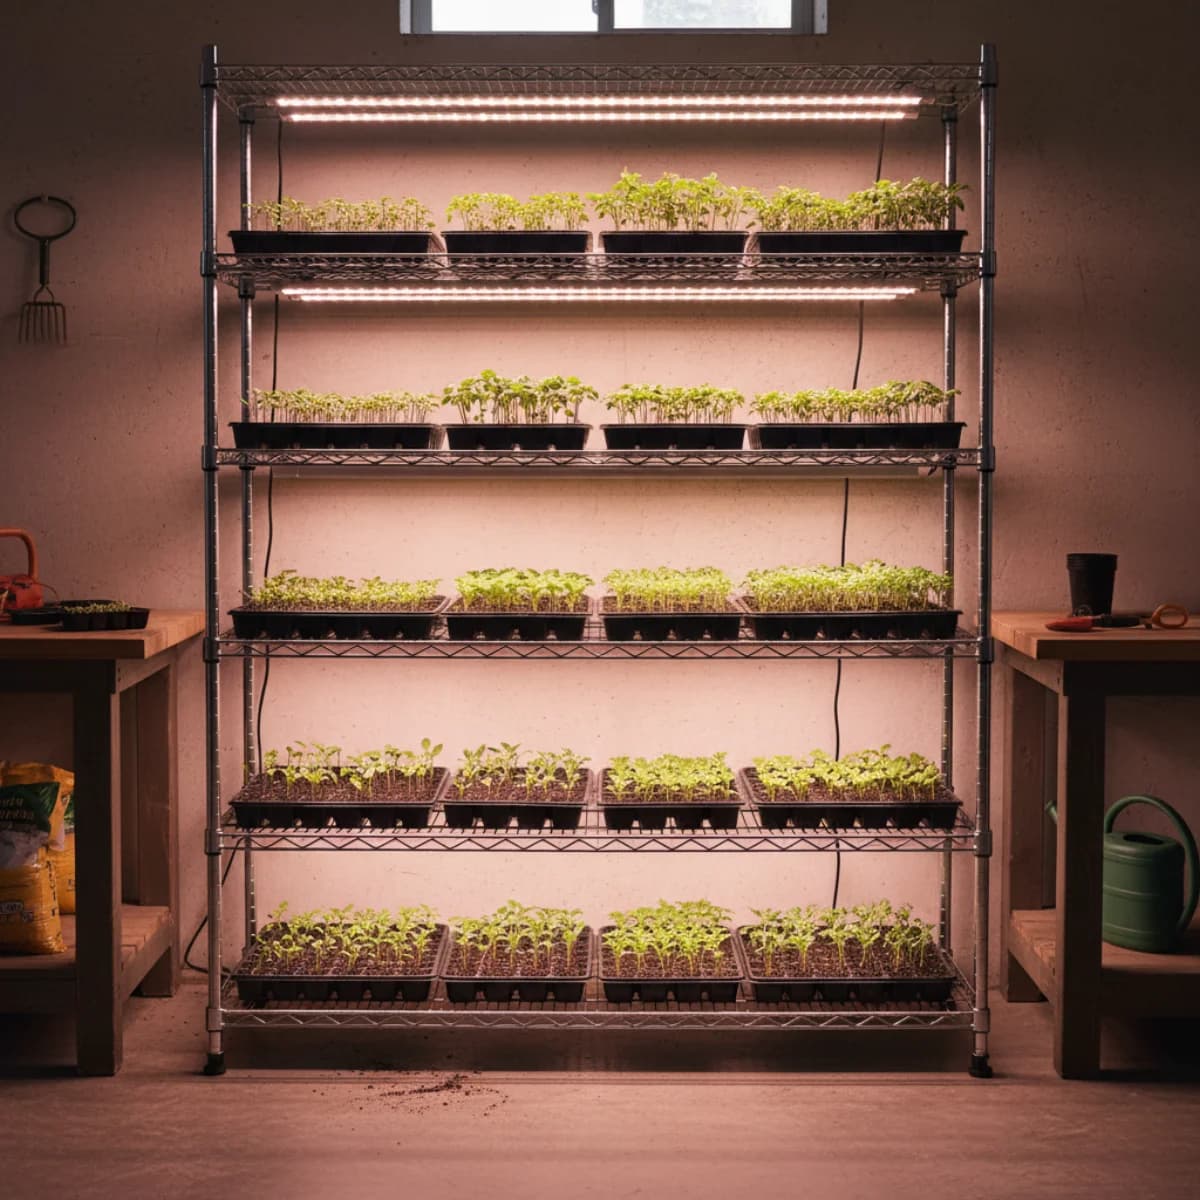
A 4-foot, two-tube T5 shop light covers a standard 10×20 seedling tray adequately. Hang it 2-4 inches above seedling tops and raise it as they grow. A timer set to 16 hours maintains consistent photoperiod.
Cost: $30-60 for a complete shop light setup.
Drawback: Fluorescent tubes degrade over time (produce less light), contain mercury, and aren’t quite as efficient as newer LEDs.
LED Shop Lights (Best Value)
LED replacements for fluorescent shop lights have become the better choice. They’re more energy-efficient (lower electricity cost), last longer, don’t degrade significantly over their lifespan, and produce minimal heat (allowing you to keep them closer to plants without burning foliage).
The “full spectrum” LED shop lights available at hardware stores and online for $25-50 work very well for seed starting. Look for fixtures rated 2000+ lumens per foot for adequate intensity.
Setup is identical to fluorescent: hang 2-4 inches above seedlings on an adjustable chain, use a timer.
Dedicated Horticulture LED Grow Lights
Marketed specifically for plant growing, these range from affordable to eye-wateringly expensive. The expensive ones are designed for flowering plants that need high-intensity light—orchids, cannabis, fruiting crops in full production. For seedling starts, they’re overkill.
The affordable options ($20-60) in bar or panel form work similarly to LED shop lights and often have a slimmer profile. Some include built-in timers. These are reasonable choices and sometimes more convenient than shop lights for small setups.
The marketing in this category is aggressive and often misleading—avoid lights that emphasize “X watts equivalent” without specifying actual PAR (photosynthetically active radiation) output. For seed starting, actual output matters more than watt claims.
Incandescent Bulbs: Skip Them
Old incandescent grow bulbs are inefficient, produce too much heat relative to useful light output, and have been largely replaced by better alternatives. Not recommended.
HID (High-Intensity Discharge) Lights: Also Skip for Seedlings
Metal halide and high-pressure sodium lights are powerful but expensive, energy-intensive, and generate significant heat. Used by serious indoor growers for full-cycle plant production. More than you need for seed starting.
Setting Up Your Grow Light
Height
Position lights 2-4 inches above seedling tops for most LED and fluorescent setups. This seems very close but is appropriate—indoor grow lights are much less intense than outdoor sun. The “hand test”: hold your hand at seedling level under the light. If it feels warm but not hot after 10 seconds, the height is appropriate.
Raise lights as seedlings grow, maintaining that 2-4 inch gap. An adjustable hanging system makes this easy—most shop lights come with hanging hardware, or use bungee cords, S-hooks, and chain.
Duration
Set your timer for 14-16 hours per day. Most light timers have simple dial or digital settings.
More isn’t necessarily better. Plants need a dark period for various physiological functions. 16 hours on, 8 hours off is a good standard. Some seedlings do fine at 14 hours; 18 hours generally doesn’t hurt.
Consistent timing matters. Running lights at irregular hours isn’t harmful but doesn’t optimize the photoperiod benefit.
Coverage Area
Each 4-foot, two-bulb shop light (or equivalent) covers roughly one standard 10×20 seedling tray adequately. For larger setups, add more fixtures.
Higher-output fixtures cover more area, but for seed starting, one light per tray is a reasonable rule.
Simple DIY Shelving Setups
The classic setup: wire shelving unit from a home goods store (like a Costco wire rack shelf), lights hung under each shelf level, hanging over the shelves below. A rack with four levels becomes four grow-light stations using four shop lights. You can start a lot of seeds in a basement or spare room corner this way.
The efficiency is appealing: one rack, four levels, enough to start a full summer garden. Cost for the rack plus four LED shop lights: around $150-200.
When Window Light Is Enough
There are situations where a window works:
- You garden in a very sunny climate (Arizona, Southern California) with large, unobstructed south-facing windows
- You’re starting seeds only a few weeks before transplanting (less time for etiolation to develop)
- You’re starting cool-season crops that are naturally somewhat tolerant of lower light
But most gardeners in most climates, starting seeds 8-12 weeks before transplanting, will produce better seedlings with supplemental light. The investment pays for itself quickly in fewer failures and better plants.
Diagnosing Light Problems
Leggy, tall, reaching seedlings: Increase light intensity (lower the fixture) or add more hours. This is the classic symptom of insufficient light.
Yellowing new growth: Usually a nutrient issue (begin fertilizing) but can also be overwatering, which reduce oxygen to roots. Check soil moisture.
Pale, washed-out color on leaves: Could be too much direct heat from lights (raise the fixture slightly) or too-intense light for the seedling stage, though this is rare with standard setups.
Stocky, compact growth with dark green color: You’ve got it right.
The good news is that grow light setup is genuinely simple once you’ve done it once, and the equipment is reusable year after year. Most of what you buy this February will still be serving you a decade from now.
Sources & Further Reading
- Lighting for Indoor Plants and Starting Seeds — University of Minnesota Extension
- What Type of Grow Lights Should You Use for Starting Seeds? — University of Minnesota Extension
- Seed Starting — University of Wisconsin Horticulture Extension
- Artificial Lighting for Indoor Plants — Royal Horticultural Society