What to Do With Tulips and Daffodils After They’ve Bloomed

By late April most of the country is past peak tulip and daffodil season. The petals have dropped, the flower stalks look tired, and the temptation to tidy up everything in one afternoon is enormous. This is the moment most gardeners make the mistake that causes weak or non-blooming bulbs the following spring: they cut the foliage off too early.
The six weeks after a spring bulb finishes blooming are when the bulb does almost all its work for next year. The leaves photosynthesize, the bulb fattens, and the flower buds for the following spring form deep inside. Cut the leaves before that process is done and you starve the bulb. Get the aftercare right and the same bulbs will come back stronger every year for a decade or more — particularly daffodils, which can outlive the gardener if treated well.
Deadhead the Spent Flowers, Not the Stems
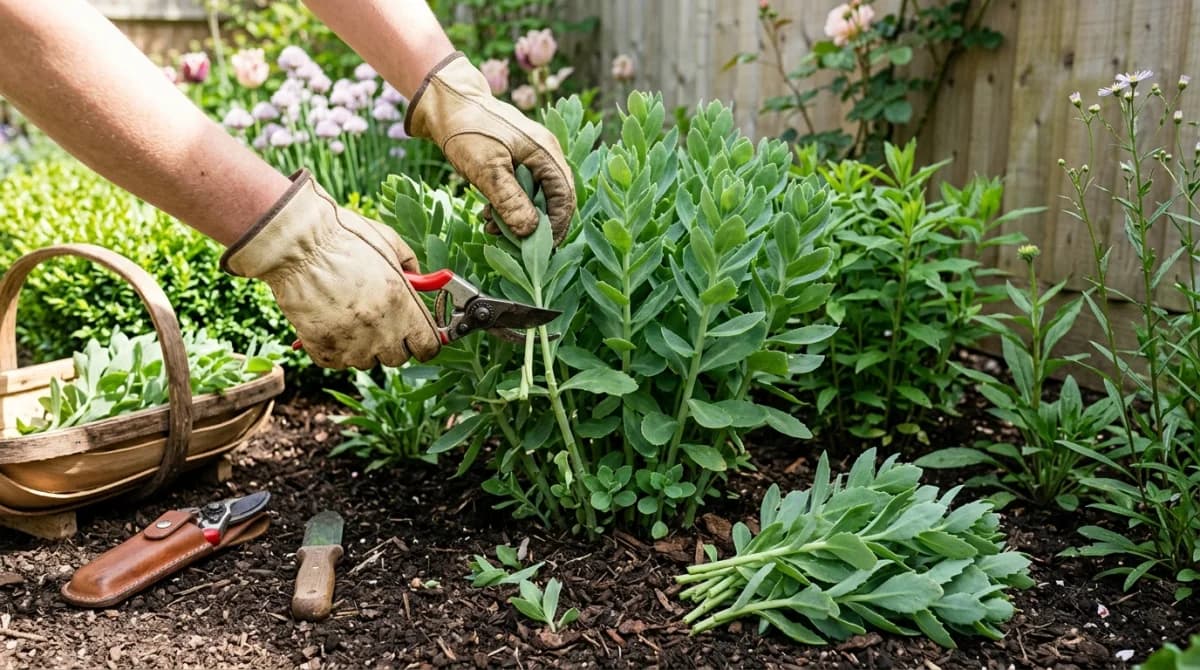
The first job, as soon as petals drop, is to remove the spent flower head. A tulip or daffodil that finishes blooming will start trying to produce seed, and seed production pulls energy away from the bulb itself.
Pinch or snip off just the seed pod at the top of the stem — the swollen green capsule that develops where the petals were. Leave the stem and all the leaves intact. The stem is also doing a small amount of photosynthesis, and on daffodils especially, it stays green and useful for several more weeks.
Tulips, oddly, are the exception to “deadhead them all.” If you grow tulips as annuals (more on that below) and intend to pull the bulbs, deadheading is optional. If you want them to come back, deadhead promptly.
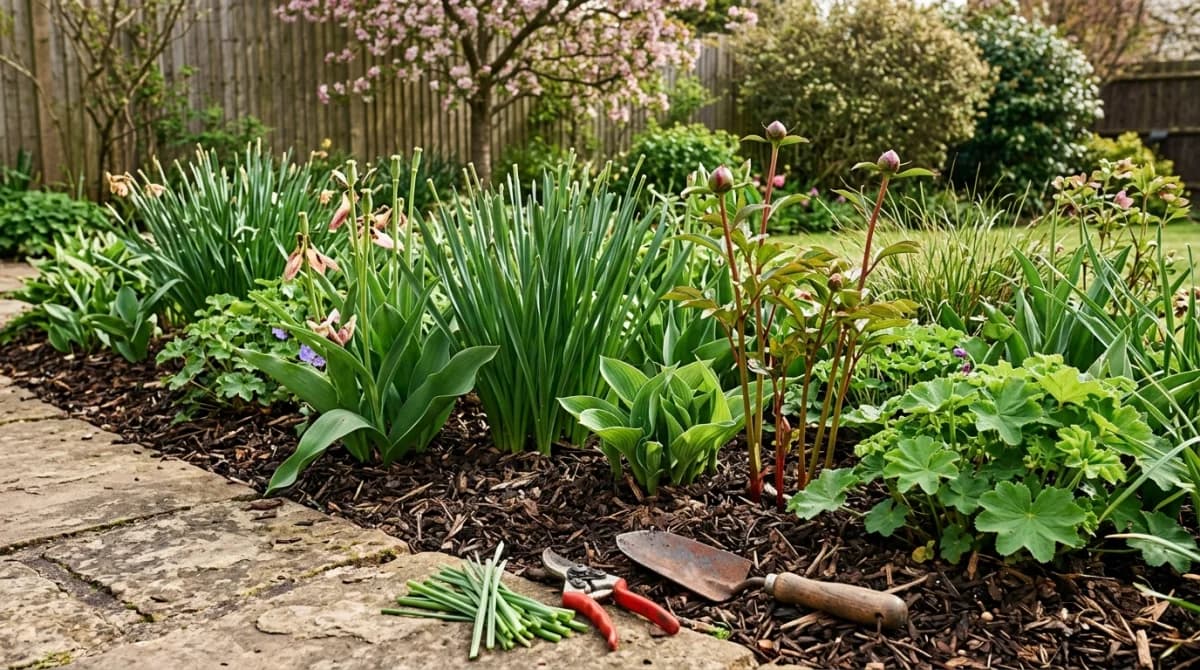
Leave the Foliage Until It Yellows
This is the rule that, more than any other, determines whether your bulbs come back well next year. The leaves must stay on the plant until they have yellowed and softened naturally. For most daffodils that takes about six weeks; for tulips, four to six. In cool springs it can take longer.
What this means in practice:
- Do not cut, fold, braid, or tie the leaves. All of these reduce the leaf surface available for photosynthesis. The old “tidy” advice to fold and rubber-band daffodil leaves was disproven decades ago in trials at the Royal Horticultural Society. Bulbs whose leaves were left alone produced significantly larger blooms the following spring than bulbs whose leaves were tied.
- Do not mow over them if your bulbs are naturalized in lawn. Skip mowing those areas until the leaves have yellowed. If that means a slightly shaggy patch for a few weeks, it is worth it.
- Do not pull leaves out even if they look untidy. Wait until they release with a gentle tug — that is the bulb’s signal that it is finished with them. Leaves that resist pulling are still feeding the bulb.
The yellow, droopy stage is genuinely ugly. There is no way around this, but there are ways to hide it.
How to Hide Fading Bulb Foliage
The trick is to plant bulbs where their fading foliage will be camouflaged by what comes after. Some approaches that work in real gardens:
- Interplant with mid-spring perennials. Hostas, daylilies, peonies, and hardy geraniums all push out lush foliage just as the bulbs are finishing. Their leaves screen the dying bulb foliage from view without competing with the bulbs underground.
- Use ornamental grasses and ferns in shadier beds. Lady fern, hakone grass, and northern sea oats fill out at exactly the right moment to hide tulip and narcissus leaves.
- Plant low ground covers above the bulbs — creeping phlox, sweet woodruff, lamium — that grow over the foliage as it fades.
- Avoid placing bulbs at the front of beds where the fade is unavoidable to look at. Push them slightly back so faster-growing plants can do the cover work.
If your existing bulb planting has nothing to cover the foliage and looks rough every May, that is a planting plan to fix in fall. Note where the bulbs are now and plan companion perennials to add this autumn.
Feed the Bulbs Now, Not in Fall
Bulbs are usually fed at planting time and then forgotten. The better approach is to feed them right after blooming, when the bulb is actively building stores for next year. A feeding now does much more work than the same feeding done in fall, when the bulb is dormant.
What to use:
- A balanced bulb fertilizer with slightly higher potassium than nitrogen — something in the range of 5-10-10 or a dedicated bulb feed. Sprinkle around the base of the foliage at the rate on the package.
- A top dressing of finished compost also works and is less likely to be overdone. Half an inch over the soil above the bulbs feeds them gently and improves the soil at the same time.
- Avoid high-nitrogen lawn fertilizers on naturalized bulbs in turf. They push too much leaf and not enough flower bud development.
Water the area well after feeding to move nutrients down to the bulb. If the spring has been dry, give the bed a deep watering even without fertilizer — bulbs are still actively growing and a dry six weeks after bloom is a common cause of weak flowering the next year.
Lifting and Dividing: When to Bother
Most spring bulbs do not need to be lifted every year. The signs that a clump needs dividing are obvious: clumps of leaves but few or no flowers, a clear crowded look on the surface, or bulbs that have been in place for five to seven years with declining performance.
Daffodils in particular love to be left alone for years and will form steadily larger clumps that flower beautifully. Lift them only when the clump becomes too crowded to flower well — usually after five to ten years.
Tulips are more complicated. Most modern hybrid tulips (the bright Triumph and Darwin types you see in catalogs) are bred for one or two strong years and then decline. Many gardeners treat them as annuals: pull the bulbs after the foliage yellows and replace them in fall. If you want tulips that come back reliably, plant species tulips (Tulipa tarda, T. clusiana, T. sylvestris) and the older Darwin Hybrids — these will perennialize for many years if left undisturbed.
If you do lift and divide, do it once the foliage has fully yellowed:
- Loosen the soil around the clump with a fork, well outside the bulbs.
- Lift the entire clump and gently separate individual bulbs by hand.
- Discard any bulbs that are soft, mushy, or showing rot.
- Replant the largest bulbs immediately at the correct depth (three times the bulb’s height), spaced further apart than they were.
- Cure smaller bulblets in a dry, airy spot for a few weeks, then plant in a nursery row to grow on for a year or two before adding back to the main display.
Plan the Real Fix in Fall
Late April is when the cracks in last fall’s planting become visible. Maybe a row of tulips that looked great on paper turned out to clash with the emerging perennials around it. Maybe a clump of daffodils is exactly where you do not want to look at yellowing leaves all of May. Maybe the colors did not work the way you imagined.
The right time to fix any of this is October, but the right time to plan it is now, when you can actually see what is wrong. Take photos and a few notes. Mark spots where bulbs underperformed and where the design needs more or different bulbs. Note which combinations worked and which clashed.
If planning bulb placement on paper feels abstract, this is one of the things that visualizing the garden ahead of time really helps with. With Gardenly , you can upload a photo of an existing bed and see how a redesign — including bulb placement, companion perennials, and seasonal layering — would actually look in your space before you commit to ordering and digging in fall. It is far easier to picture next April from an April photo than from a fall planting plan with everything underground.
A Short Late-Spring Bulb Calendar
For zones 5 through 7, where most readers will be reading this in late April:
- Now (late April): Deadhead spent flowers. Apply a light bulb fertilizer or compost top dressing. Water if dry.
- Next 4–6 weeks: Leave foliage alone completely. Mow around naturalized bulbs, not over them.
- Mid-June, when foliage has yellowed: Lift and divide any clumps that needed it. Pull annual tulips if you grow them that way.
- Through summer: Mark the spots with golf tees or short stakes so you remember where bulbs are when you plant fall companions.
- September–October: Plant new bulbs and any companion perennials chosen to hide foliage next May.
The work in late April is mostly the work of restraint — leaving things alone that look ugly, feeding what does not look hungry, planning rather than tidying. Done right, the same bulbs will give you a better display every spring for years.
Sources
- Royal Horticultural Society — Daffodils: After Flowering Care
- Royal Horticultural Society — Tulips: After Flowering Care
- University of Minnesota Extension — Planting and Caring for Spring-Flowering Bulbs
- Penn State Extension — Caring for Spring-Flowering Bulbs After They Bloom
- Cornell Cooperative Extension — Spring Bulb Care