Stop Slugs and Snails Before They Wreck Your Spring Garden

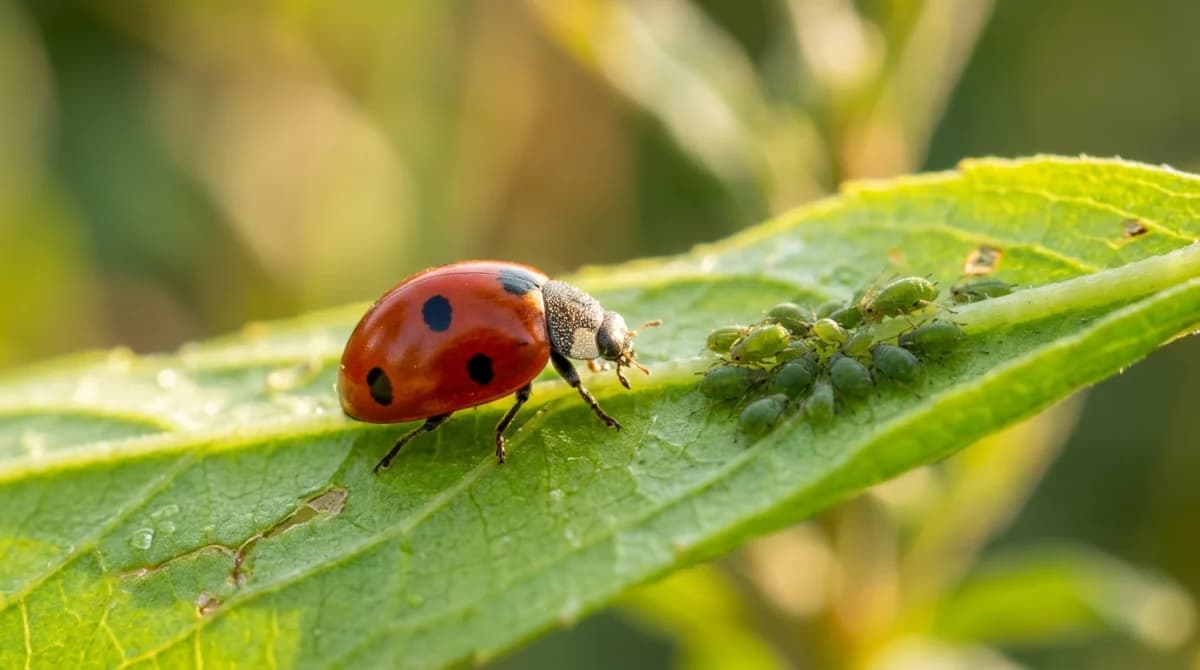
Every gardener has had the morning where a row of perfect lettuce seedlings is suddenly a row of perfect lettuce stumps. Or the new hosta that pushed up looking like a tight green fist last week is now a lace doily. Slugs and snails do their work in the dark, in wet weather, and in the four to six weeks of late April through early June when everything in the garden is soft, green, and exactly what they want to eat. By the time you see the damage, the plants you wanted most are usually the worst hit.
The good news is that slug pressure is mostly predictable, and the right response is not a single product but a few small habits stacked together. A garden that gets through May without serious slug damage almost never relies on one heroic intervention. It relies on a tidy boundary, a couple of physical barriers around the most vulnerable plants, and one targeted bait used early — before the population peaks rather than after.
Why Late April Is the Critical Window
Slugs and snails overwinter as eggs in moist soil and as adults under stones, mulch, and leaf litter. The first warm rains of spring trigger both: eggs hatch, and adults come out to feed and mate. A single garden snail can lay around eighty eggs at a time, several times a season. A slug can lay several hundred a year. The math is uncomfortable. If you skip control in April and May, you are not dealing with the same population in June — you are dealing with the next generation, and it is much larger.
The other reason this window matters is the food supply. In late April, almost everything the slugs prefer is at its most tender. Hosta shoots, dahlias, delphiniums, lettuce, basil, beans, marigold seedlings, primulas — all soft, all unprotected, all suddenly in the open. By July, the same plants have toughened leaves, tougher stems, and enough mass to shrug off some damage. In May, ten slugs can flatten a row of seedlings in a single damp night.
So the goal in late April is not to eradicate every mollusk in the garden. It is to break the spring population spike before the most vulnerable plants pay for it.
Step One: Tidy the Edges, Not the Whole Garden
Slugs and snails need shelter during the day. They die quickly in sunlight and dry air, so they spend the daylight hours under anything that holds moisture: long grass at the bed edge, fallen pots, planks left lying around, dense mulch right against stems, the underside of low boards.
A walk around the garden with a bucket, looking specifically for the wet, shaded gaps along bed edges and walls, removes most of the daytime hiding spots. You do not need to obliterate every habitat — beneficial predators like ground beetles also live in these places. The aim is to reduce the daytime cover within a few feet of the most vulnerable beds, not to sterilize the whole garden.
A few targeted moves help most:
- Pull mulch back two inches from the base of vulnerable plants. Mulch right against a stem is a slug hotel. A small ring of bare soil around the crown denies cover and dries out faster.
- Lift planks, pots, and trays. Anything sitting flat on the soil for more than a day or two is sheltering slugs underneath. Stand pots on feet or move them.
- Mow the strip of grass closest to the borders. Tall lawn at the bed edge is a year-round nursery. Keeping that strip short cuts the daily commute.
- Leave the rest alone. A wild corner thirty feet from the vegetable bed is fine. Predator habitat there helps you. The problem is the cover within striking distance of soft growth.
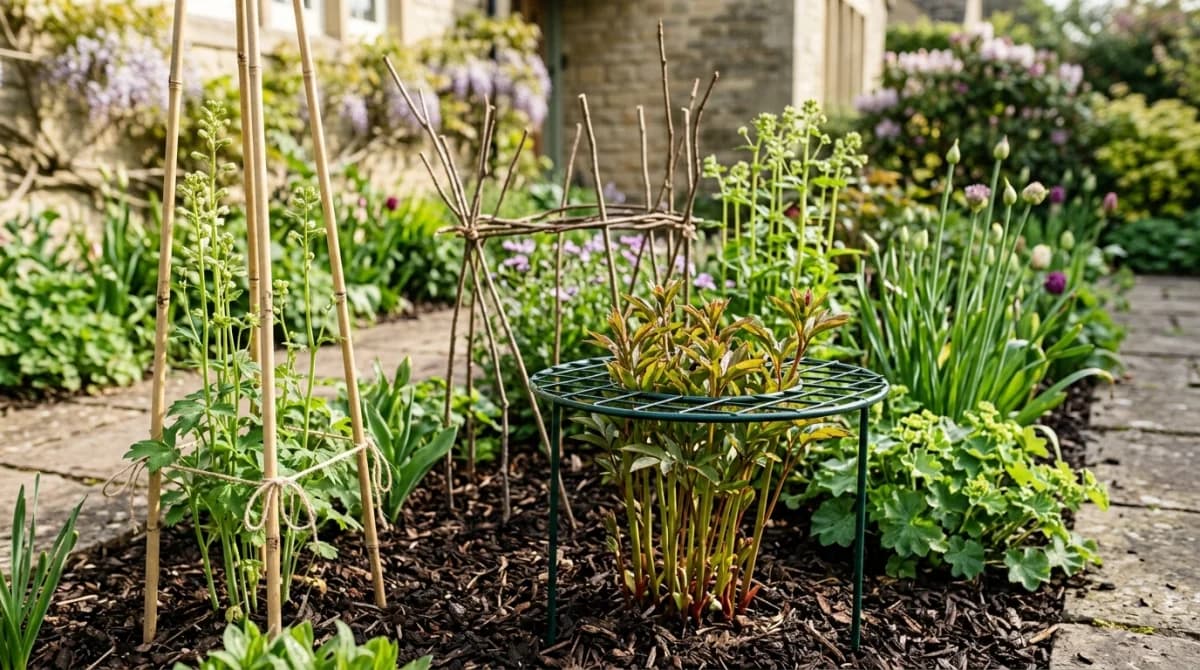
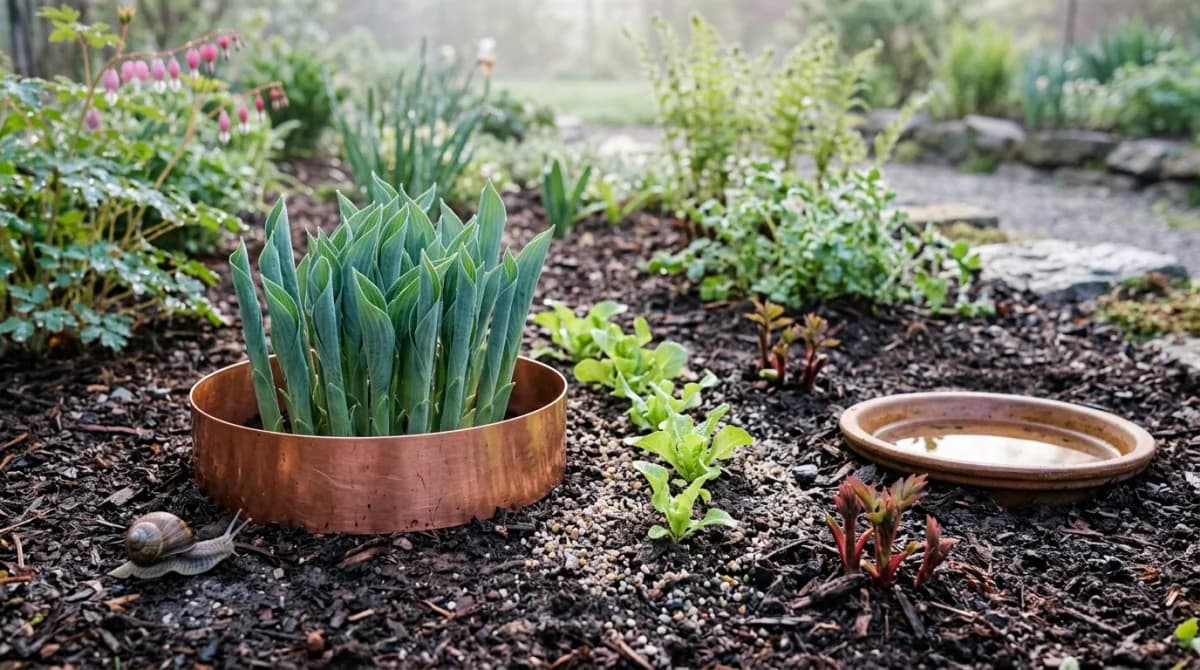
Step Two: Physical Barriers Around What Matters Most
You cannot barrier the whole garden. You can barrier the plants that justify the effort: hostas, dahlias, new transplants, seedling rows, a few prized perennials. Spend the time on those and let the rest of the garden carry some risk.
Copper rings and tape
Copper reacts with slug mucus and gives them a small electric shock. It works, but only if the barrier is unbroken. A copper ring around a single hosta crown, or copper tape around the rim of a raised bed, will stop slugs from crossing as long as no leaf is bridging from outside the ring to inside. Check weekly for foliage acting as a slug bridge.
Copper rings sized for individual plants are the highest-value use of the material. A four-inch-tall ring around an emerging hosta clump in late April is one of the few barriers that just works. Tape around raised vegetable beds is also effective, though it has to be replaced every couple of seasons as the copper tarnishes.
Crushed shells, grit, and wool pellets
Sharp materials work to a point. Crushed eggshells, sharp horticultural grit, and wool pellets all create a band that is uncomfortable for slugs to cross. None are absolute — a determined slug crossing damp grit will still get through — but a wide enough band, kept in place, dramatically slows them down. Two to three inches wide, refreshed after heavy rain, is the right scale.
Wool pellets have the bonus of slowly breaking down into the soil. They are the easiest to use around new transplants and stay effective for several weeks before they need topping up.
Cloches for vegetable seedlings
For a row of lettuce, beans, or any tender vegetable seedling, the most reliable barrier is a physical cover for the first two weeks. A cut-off plastic bottle cloche over each seedling, or a length of fine mesh tunnel over a row, gets the plants through their most vulnerable phase. Once the leaves are tougher and the plant is established, the cloche comes off and the row can take some pressure.
Step Three: Trapping and One Targeted Bait
Habitat reduction and barriers are the foundation. Trapping and baiting are the active layer that actually pulls down the population.
Beer traps
Beer traps work — modestly. A shallow container sunk to soil level, filled an inch deep with cheap beer, will collect slugs through the night. The catch per trap is small, and you need to empty them every couple of days, but in a small garden a few traps near the most vulnerable beds noticeably reduce pressure. The downside is that the trap also attracts ground beetles, which are your allies. Use traps sparingly and place them at least a few feet from any obvious beetle habitat.
Iron phosphate baits
Of all the chemical options, iron phosphate is the one worth using. It breaks down into iron and phosphate in the soil — both nutrients — and is approved for organic growing. Slugs and snails eat it, stop feeding within a day, and die a few days later out of sight. It is safe around pets and wildlife in a way that older metaldehyde baits never were.
The mistake most people make with iron phosphate is using it after the damage is obvious. By then the population has peaked and the bait is reactive. Apply it in late April and again three weeks later, scattered thinly around the most vulnerable beds rather than piled in one spot. A small amount, applied early, breaks the spring breeding cycle. A heavy application after the leaves are already shredded just kills the slugs that already ate.
Avoid metaldehyde baits entirely. They are toxic to dogs, cats, hedgehogs, and birds, and the iron phosphate alternative is just as effective.
Step Four: Encourage the Predators
A garden that hosts slug-eating wildlife handles slug pressure with very little intervention. Frogs, toads, hedgehogs, ground beetles, and several bird species (especially thrushes and ducks if you have a pond) all eat slugs in serious quantities. A pond of any size, a log pile in a quiet corner, an undisturbed strip of taller planting at the back of a border — these are the long-term answer.
Encouraging predators is slow. It does not solve this year’s problem on its own. But a garden in its third or fourth year of being friendly to ground beetles and amphibians has a slug problem of a different scale than a garden that has been sprayed and tidied compulsively.
A Realistic Late-April Plan
For a typical residential garden, the next two weekends are the high-leverage moment. A practical sequence:
- Walk the borders at dusk with a flashlight on the next damp evening. You will see exactly where the slugs are concentrated. This is the map of where to focus.
- Tidy the edges within a few feet of vulnerable beds. Pull mulch back from stems, lift any plank or pot left sitting flat, mow the bordering strip of lawn.
- Ring the highest-value plants with copper or wool pellets — hostas, dahlias, any new perennial transplant.
- Cloche or net seedling rows for the first two weeks after planting out.
- Scatter iron phosphate bait thinly around the most pressured beds. Repeat in three weeks.
- Set two or three beer traps at the edges of the worst-hit areas, emptied every couple of days.
If you are also planning a redesign — moving plants around, replacing a tired border, choosing where to put new transplants — it is worth thinking about slug pressure as part of the layout. Hostas in a damp shaded corner near long grass will need much more help than the same plants in a drier, sunnier bed with hard edges. Gardenly can help you visualize how a new layout will sit in your yard before you commit, which makes it easier to put vulnerable plants where the conditions are slightly less in the slugs’ favor.
Slugs and snails will not disappear from any real garden. The goal is not zero damage. It is keeping the population low enough through May that the plants you care about most get to harden up, fill out, and become the kind of mass that can take a few holes without anyone noticing.
Sources
- Royal Horticultural Society — Slugs and Snails
- University of Minnesota Extension — Slugs in Home Gardens
- Penn State Extension — Slug Management in Home Gardens
- UC IPM — Snails and Slugs Pest Notes